Table of Contents
Making fermented foods in a water-sealed crock is easier than you would imagine while always delivering successful results if you only follow critical fermenting rules.
That is because a ceramic water-sealed crock is designed with the protection mechanism to eliminate mold, which allows you to focus on being creative and playful with flavors, textures and colors.
The fascinating process of preservation by fermentation
We pack vegetables together tightly with water or salt (or both) to generate the oldest practice of food preservation recorded in human society. Fermentation is the best method to preserve nutrients and vitamins in food (most notably vitamin C), while also adding vitamins, such vitamin K.
During the fermentation, naturally occurring yeasts, bacteria, enzymes or fungi convert carbohydrates into carbon dioxide, alcohols and organic acids. It is a decomposing process, which we control in our sealed crock’s safe environment. This phase traps in the flavorful, healthy components of food.
In our crocks we can both ferment and pickle
We can:
- Ferment raw vegetable mixes – such as sauerkraut and kimchi
- Make fermented condiments – such as hot chili sauce
- Ferment or pickle whole or cut vegetables – such as cucumbers, cauliflower, carrots and beets.
Fermenting vs Pickling
The difference between pickling and fermenting is that in fermenting, we allow the lactic acid bacteria to transform the vegetable’s substance and fill it with the microbiome, which preserves the nutrients efficiently and affects our body significantly. Pickling is a process of marinating, soaking the vegetables in vinegar, or boiling them with salty water, both of which hurt the lactic acid bacteria and won’t let them grow. However, it makes for a tasty condiment.
7 Steps to Using a Fermenting Crock:
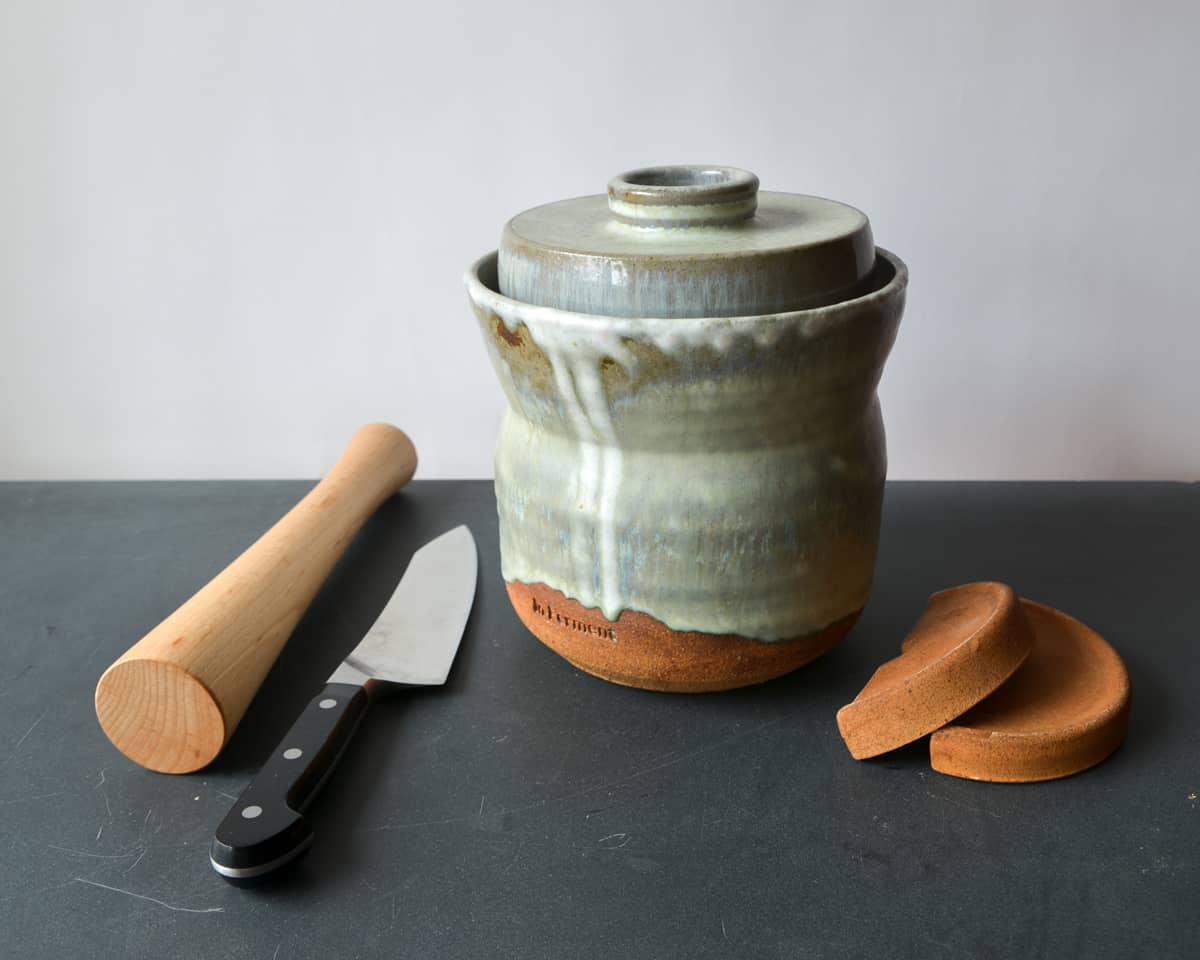
1. Gather Your Tools
- Fermentation Crock
- Stone Weights
- Wooden tool for packing the crock
- Knife to cut vegetables
- Cutting Board
2. Preparing
Cut the vegetables and mix them with salt and other spices following the recipe, or leave them as a whole ready for the next step.
Browse our fermenting recipes for inspiration.
4. Packing & Compressing
Arrange the vegetables in layers with spices and additional flavors such as grape leaves, garlic, seeds, etc. make sure they are packed and compressed in the space.
Press the vegetable tightly to reduce air pockets in the crock.
5. Submerging
Add the brine, which is the salty water. Some vegetables have plenty of water released when introduced to salt, as it occurs to cabbage in making sauerkraut.
Press the stone-weights on top of the vegetables or the mix and make sure there is enough brine to cover the stones.
The stones are your “insurance policy” that the vegetables are submerged under the brine.
6. Sealing
Seal the crock by placing the lid in the crock’s trough and add tap water.
Remember to check and add water as it evaporates over time, obviously in a hot room or hot climate the water will evaporate faster than in a cold room or in the winter.
7. Opening, Storing, & Enjoying
Wait at least 7-10 days before opening the crock to have fermented vegetables full of probiotics rather than sour marinated vegetables.
Once they taste good, take out the vegetables with the brine and fill ordinary glass jars and store in the refrigerator. Fermented vegetables can last for a long time in a cold environment. Since the bacteria isn’t active, the flavor will not change, and the preserved vegetables will last for many weeks.
I have jars stored in the regenerator for months, such as a year-old kimchi that still tastes deliciously.
Make sure to read our tips on preventing mold when fermenting foods.
How Long Does it Take to Ferment Food?
After a day or two, you will see and hear bubbles come out through the water in the trough. This is a rewarding experience that ensures the system is working!
Fermented food can be ready in as little as 7 days. Some foods taste better the longer you ferment. Make sure not to open the crock in the first 7 days of fermenting. Once you open the container, the food is exposed to oxygen which can create conditions for mold. It’s recommended to try fermenting for different periods of time.
Start another batch of fermented food while enjoying the current batch. You now begin a cycle of making a batch ready when your jars in the refrigerator get empty.


